
Rear Brake Pad Replacement Cost: Driveway Service Guide

Rear Brake Pad Replacement Cost: Mobile Driveway Service Guide

Rear brake pad replacement is one of the most essential maintenance tasks for keeping your vehicle stopping safely and predictably. While front brake pads handle the majority of forward braking momentum, rear pads provide critical stability, prevent nose-diving during sudden stops, and integrate directly with your emergency parking brake system.

When rear brake pads wear thin, they compromise your vehicle’s overall stopping power and expose expensive rear rotors to severe scoring. Understanding the real-world rear brake pad replacement cost—and knowing your service options—helps you make smart maintenance decisions without overpaying at a repair shop or dealership.

Most drivers encounter rear brake pad replacement every 40,000 to 70,000 miles, depending on commuting habits, vehicle weight, and traffic conditions.

Average Rear Brake Pad Replacement Costs Breakdown

Professional rear brake pad replacement costs vary widely based on vehicle make, hardware complexity, and service model.

[Traditional Dealerships] --> $300 – $500 per axle (High labor rates, OEM markups)
[Independent Repair Shops] --> $195 – $350 per axle (Competitive pricing, shop waiting room)
[The Brake Squad Mobile]   --> Transparent, flat-rate pricing installed right in your driveway

Cost Factors by Vehicle Type

  • Standard Commuter Sedans & Hatchbacks: $195 – $300 per axle for quality ceramic or semi-metallic pads.

  • SUVs, Crossovers, & Light Trucks: $225 – $400 per axle due to larger pad surface area and heavier-duty hardware.

  • Luxury & European Vehicles: $300 – $550+ per axle due to specialized electronic park brake (EPB) retraction requirements and wear sensors.

When rear rotors also need replacement due to wear below safety specifications, full package services typically range from $375 to $750 per axle.

Key Factors That Influence Your Final Bill

Several mechanical factors dictate final replacement pricing beyond basic parts:

Cost Factor Impact on Service & Pricing
Pad Material Selection Basic organic pads cost less but wear faster; premium ceramic pads offer silent, low-dust performance and extended service life.
Electronic Parking Brakes (EPB) Modern rear calipers often feature electronic parking brake motors that require specialized diagnostic tools to retract safely into service mode.
Hardware & Caliper Pins Seized slide pins or rusted anti-rattle clips require cleaning and high-temperature lubrication to prevent uneven inner pad wear.

The DIY Catch: Electronic Parking Brakes & Safety Hazards

While attempting a DIY rear brake job might seem like a way to save on labor, rear brake assemblies on modern vehicles present unique challenges:

  1. Electronic Parking Brake (EPB) Failure: Compressing rear caliper pistons manually without electronically retracting the internal motor can destroy expensive caliper electronics.

  2. Specialized Wind-Back Tools: Unlike front calipers that compress straight back with a standard clamp, many rear caliper pistons must be rotated and pressed simultaneously.

  3. Safety & Workspace Limits: Jacking up a vehicle on street pavement or in an apartment complex carries significant safety risks without proper jack stands and level ground.

The Driveway Convenience Advantage

Why pay inflated dealership labor rates or waste hours sitting in a noisy auto shop waiting room just to get your rear brakes serviced?

The Brake Squad eliminates the hassle entirely. Our ASE-certified technicians bring a fully equipped mobile rolling service bay directly to your home driveway or workplace parking space. We perform a multi-point inspection, measure rear pad thickness to the millimeter, service electronic parking brake systems, and execute complete rear brake pad replacements on-site.

Get an Upfront Estimate for Rear Brake Replacement Today

Protect your vehicle’s stopping power and skip the repair shop waiting room. Trust our team for transparent pricing and factory-quiet results delivered straight to your door.

Visit www.thebrakesquad.com to check our active mobile service area, or call us directly at 703-994-2773 (or email info@thebrakesquad.com) to receive an upfront estimate for your driveway rear brake service today.

Brake Rotors Replacement Near Me: Driveway Service Guide

Understanding Brake Rotors and When You Need Replacement

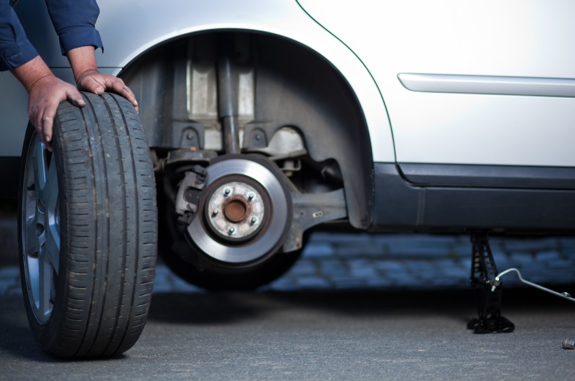
Brake rotors are essential components of your vehicle’s braking system that work alongside brake pads to stop your car safely. These circular metal discs spin with your wheels and provide the surface that brake pads clamp down on to create the friction needed for stopping power.

Knowing when your brake rotors need attention is crucial for both safety and cost management. Most rotors require replacement when they become too thin from normal wear, develop significant warping that causes vibration during braking, or sustain damage like deep scoring or cracking. The typical replacement interval varies widely based on driving conditions, but many vehicles need new rotors every 50,000 to 100,000 miles.

Modern vehicles often have specific rotor thickness requirements measured in millimeters. Once rotors wear below the manufacturer’s minimum thickness specification, they must be replaced rather than resurfaced. This safety threshold ensures adequate heat dissipation and structural integrity during emergency braking situations.

Where to Find Brake Rotors Near You

Finding quality brake rotors in your local area involves exploring several types of automotive retailers and service providers, each offering different advantages for various situations and budgets.

National Auto Parts Chain Stores

Major national chains like AutoZone, Advance Auto Parts, and O’Reilly Auto Parts maintain extensive local networks with consistent inventory and competitive pricing. These stores typically stock brake rotors for common vehicle makes and models, often offering same day availability for popular applications.

National chains provide several key advantages including standardized return policies, nationwide warranties, and the ability to transfer products between locations if your local store lacks specific parts. Many locations also offer free testing services to help diagnose brake issues before purchase.

Local Independent Auto Parts Stores

Independent automotive retailers often excel in personalized service and specialized knowledge of regional vehicle preferences. These businesses frequently maintain relationships with local machine shops for rotor resurfacing services and may offer more flexible pricing on bulk purchases or professional accounts.

Local stores can be particularly valuable when dealing with older vehicles, imported models, or specialty applications where national chains might have limited options. The staff at independent stores often have deeper mechanical knowledge and can provide more detailed installation guidance.

Automotive Service Centers and Repair Shops

Full service automotive facilities provide the complete solution of parts procurement and professional installation in one location. Many shops source their brake components from commercial suppliers, potentially offering better pricing on premium brands compared to retail auto parts stores.

Service centers typically warranty both parts and labor, creating accountability for the entire brake system repair. This approach can provide peace of mind, especially for drivers who lack mechanical experience or proper tools for brake work.

Comparing Brake Rotor Quality and Pricing Options

Understanding the range of brake rotor quality levels and corresponding price points helps you make informed decisions that balance performance needs with budget constraints.

Economy Grade Rotors

Budget friendly brake rotors typically feature basic casting processes and standard metal compositions designed to meet original equipment specifications at minimum cost. These components work adequately for typical daily driving in normal conditions but may have shorter service life and less consistent performance under stress.

Economy rotors generally cost between forty and eighty dollars per rotor depending on vehicle size and complexity. While the initial savings can be attractive, consider the total cost of ownership including potential earlier replacement intervals.

Premium and Performance Options

Higher grade brake rotors incorporate advanced metallurgy, precision machining, and enhanced cooling designs that provide superior performance and longevity. Premium rotors often feature cross drilled or slotted patterns that improve heat dissipation and reduce brake fade during demanding use.

Performance oriented rotors typically cost between one hundred and three hundred dollars per rotor but can deliver significantly longer service life and better braking consistency. These components are particularly valuable for vehicles used in mountainous terrain, heavy towing, or spirited driving.

Professional Installation vs DIY Brake Rotor Replacement

The decision between professional installation and do it yourself brake rotor replacement depends on several practical factors including mechanical skill level, available tools, and time constraints.

Professional brake rotor installation typically costs between one hundred fifty and four hundred dollars in labor charges depending on vehicle complexity and local market rates. This investment includes proper torque specifications, brake system bleeding, and post installation testing that ensures optimal safety and performance.

DIY brake rotor replacement can provide substantial savings for mechanically inclined vehicle owners who possess the necessary tools and workspace. However, brake system work requires precision and attention to detail since any mistakes directly impact vehicle safety and stopping ability.

Timing Your Brake Rotor Replacement

Strategic timing of brake rotor replacement can help you avoid emergency repairs while maximizing value from both old and new components.

The most cost effective approach involves replacing rotors when brake pads reach their service limit, since the labor costs overlap significantly. This timing also prevents new brake pads from wearing unevenly against old rotor surfaces that may have developed minor imperfections.

Seasonal considerations can also influence optimal replacement timing. Many automotive service centers offer promotional pricing during slower periods, typically late fall and early spring when demand for brake services decreases compared to summer vacation and winter weather preparation seasons.

Evaluating Local Brake Service Providers

Selecting the right local provider for brake rotor services requires careful evaluation of several key factors that impact both immediate satisfaction and long term value.

Research potential service providers through online reviews, Better Business Bureau ratings, and recommendations from trusted sources like family, friends, or other automotive professionals. Pay particular attention to feedback regarding work quality, pricing transparency, and customer service responsiveness.

Request detailed written estimates that specify parts brands, labor rates, and additional services like brake fluid replacement or system inspection. Reputable shops provide clear explanations of recommended work and avoid high pressure sales tactics for unnecessary services.

Maintaining Your Investment in New Brake Rotors

Proper maintenance practices can significantly extend the service life of new brake rotors while maintaining optimal braking performance throughout their operational period.

Avoid aggressive braking habits that generate excessive heat and accelerate rotor wear. This includes unnecessary hard stops, riding the brake pedal during downhill driving, and failing to allow adequate cooling time after demanding brake use.

Regular brake system inspections help identify developing issues before they cause expensive damage to rotors or other components. Most brake problems progress gradually, making early detection and correction much more cost effective than emergency repairs.

Quality brake fluid maintenance also protects rotor longevity by ensuring consistent hydraulic pressure and preventing corrosion within the brake system. Follow manufacturer recommendations for brake fluid replacement intervals, typically every two to three years regardless of mileage.

Making the Smart Choice for Your Vehicle

Finding the right brake rotors near you ultimately depends on balancing quality requirements, budget constraints, and service preferences specific to your driving needs and mechanical comfort level.

Consider the total cost of ownership rather than just initial purchase price when evaluating options. Higher quality rotors that last significantly longer can provide better value despite higher upfront costs, especially when combined with professional installation that includes comprehensive warranties.

Take advantage of local expertise and competitive markets by obtaining multiple quotes and asking detailed questions about product specifications, installation procedures, and warranty coverage. The best choice combines quality components, skilled installation, and ongoing support that keeps your vehicle safe and reliable for years to come.

Brake Rotor Replacement: Complete Guide to Costs, Process, and When to Replace

Brake rotors are critical safety components that work with your brake pads to stop your vehicle. Understanding when and how to replace them can save you money while ensuring your safety on the road. This comprehensive guide covers everything you need to know about brake rotor replacement, from identifying warning signs to understanding costs and deciding between professional and DIY installation.

What Are Brake Rotors and Why Do They Need Replacement?

Brake rotors, also called brake discs, are metal discs attached to your wheels that create the friction surface for your brake pads. When you press the brake pedal, the brake pads clamp down on these rotors to slow and stop your vehicle. Over time, rotors wear down from this constant friction and heat exposure.

Most rotors are made from cast iron or steel, though high performance vehicles may use carbon ceramic rotors. The constant heating and cooling cycles, combined with the friction from brake pads, gradually wears down the rotor surface. Eventually, the rotors become too thin or warped to function safely, requiring replacement.

Signs You Need Brake Rotor Replacement

Recognizing the warning signs of worn rotors helps prevent dangerous brake failure and more expensive repairs. Here are the key indicators that your rotors need attention:

Vibration When Braking

The most common sign of warped rotors is a pulsating or vibrating sensation in the brake pedal or steering wheel when braking. This happens because the rotor surface is no longer smooth, causing uneven contact with the brake pads. The vibration typically worsens as the rotors continue to warp.

Squealing or Grinding Noises

While squealing often indicates worn brake pads, it can also signal rotor problems. If you hear grinding noises, this suggests metal on metal contact, which means the brake pads are completely worn and may be damaging the rotors. Continuing to drive with grinding brakes can make rotor replacement necessary when resurfacing might have been sufficient.

Visual Inspection Signs

Look through your wheel spokes to examine the rotor surface. Signs of rotor wear include:

  • Deep grooves or scoring marks
  • Rust or corrosion beyond surface level
  • Blue discoloration from overheating
  • Visible warping or uneven thickness
  • Cracks in the rotor surface

Reduced Braking Performance

If your vehicle takes longer to stop or the brake pedal feels soft and spongy, worn rotors could be contributing to the problem. While other brake system issues can cause these symptoms, rotors that are too thin or warped cannot provide adequate stopping power.

Brake Rotor Replacement Cost Breakdown

Understanding rotor replacement costs helps you budget for this important maintenance and make informed decisions about where to have the work done. Costs vary significantly based on your vehicle type, rotor quality, and service location.

Parts Costs

Brake rotors typically cost between $30 to $75 each for standard passenger cars, with luxury and performance vehicles requiring rotors that cost $100 to $300 or more per rotor. Since rotors are usually replaced in pairs per axle, multiply these costs by two for front or rear axle replacement.

Economy rotors offer basic functionality at the lowest price point, while premium rotors may feature better heat dissipation, longer lifespan, or performance enhancements. The quality difference can be significant, so consider your driving habits and vehicle requirements when choosing rotors.

Labor Costs

Professional installation typically costs $100 to $200 per axle in labor charges. The exact cost depends on your location, the complexity of your brake system, and whether additional services like brake pad replacement are performed simultaneously. Dealerships generally charge more than independent shops, but may offer specialized expertise for luxury or imported vehicles.

Total Replacement Costs by Vehicle Type

Here are typical total costs for rotor replacement per axle, including parts and labor:

  • Compact cars: $150 to $300
  • Mid size sedans and SUVs: $200 to $400
  • Full size trucks and SUVs: $300 to $500
  • Luxury vehicles: $400 to $800
  • High performance or exotic cars: $600 to $1,500 or more

These ranges assume replacement of both rotors on one axle along with brake pads, which is typically recommended when rotors are replaced.

Rotor Replacement vs Resurfacing: Which Option Is Right?

Not all worn rotors require complete replacement. In some cases, resurfacing or machining the rotors can restore their functionality at a lower cost.

When Resurfacing Works

Rotor resurfacing involves machining a thin layer off the rotor surface to create a smooth, even finish. This option works when:

  • Rotors have minor warping or surface irregularities
  • The rotors are still above minimum thickness specifications
  • There are no cracks or severe heat damage
  • The rotors have only been resurfaced once or twice before

Resurfacing typically costs $10 to $25 per rotor, making it an attractive budget option when appropriate.

When Replacement Is Necessary

Complete rotor replacement becomes necessary when:

  • Rotors are below minimum thickness (usually stamped on the rotor)
  • Deep grooves, cracks, or heat damage are present
  • Previous resurfacing attempts have failed
  • The rotors are severely warped
  • Cost of resurfacing approaches replacement cost

Many modern rotors are manufactured thinner than older designs, making them unsuitable for resurfacing and requiring replacement even on first service.

DIY Brake Rotor Replacement Process

Replacing brake rotors yourself can save significant money on labor costs, but requires mechanical skill, proper tools, and attention to safety. This job typically takes 1 to 3 hours per axle for experienced DIYers.

Required Tools and Materials

Before starting, gather these essential tools:

  • Jack and jack stands or vehicle lift
  • Lug wrench and socket set
  • Brake caliper tool or C clamp
  • Wire brush and brake cleaner
  • Torque wrench
  • Safety glasses and gloves
  • New rotors and brake pads
  • High temperature brake grease

Step by Step Replacement Process

Follow these general steps, but always consult your vehicle specific service manual:

  1. Safely lift and secure the vehicle
  2. Remove the wheel and tire
  3. Remove the brake caliper and secure it with wire
  4. Remove the brake pads
  5. Remove the caliper bracket if necessary
  6. Remove the old rotor (may require removing dust cap and axle nut)
  7. Clean the hub surface thoroughly
  8. Install the new rotor
  9. Reassemble components in reverse order
  10. Torque all fasteners to specification
  11. Repeat for the opposite side

Important Safety Considerations

Brake work affects your vehicle’s most critical safety system. Never attempt rotor replacement unless you have experience with automotive repairs and understand the risks. Consider these safety points:

  • Always replace rotors in pairs per axle
  • Use only rotors that meet or exceed OEM specifications
  • Properly torque all fasteners
  • Bed in new rotors and pads according to manufacturer instructions
  • Test brakes carefully before normal driving

If you have any doubts about your ability to complete this repair safely, have the work done by a qualified technician.

How to Save Money on Brake Rotor Replacement

Several strategies can help reduce the cost of rotor replacement without compromising safety or quality.

Shop Around for Quotes

Get estimates from multiple shops, including independent mechanics, chain stores, and dealerships. Prices can vary significantly, and some shops may offer package deals when replacing pads and rotors together. Be sure to compare the same quality level of parts and services.

Choose Independent Shops

Independent repair shops typically charge less than dealerships for rotor replacement, often providing 20 to 40 percent savings on labor costs. Many independent shops use quality parts and offer warranties comparable to dealerships.

Buy Parts Separately

Purchasing rotors from auto parts stores or online retailers and bringing them to a shop for installation can save money. Many shops will install customer provided parts, though they may not warranty the parts themselves.

Bundle Services

If your brake pads also need replacement, having both services done together often costs less than separate visits. Some shops offer package pricing for complete brake services that include pads, rotors, and brake fluid replacement.

Consider Timing

Some repair shops offer promotions during slower periods or seasonal brake service specials. However, never delay necessary brake repairs for cost savings, as this compromises safety.

Choosing the Right Replacement Rotors

Selecting appropriate rotors ensures optimal performance, longevity, and value for your specific vehicle and driving conditions.

OEM vs Aftermarket Options

Original Equipment Manufacturer (OEM) rotors are identical to those installed when your vehicle was built. They offer guaranteed fit and performance but typically cost more than aftermarket alternatives. Quality aftermarket rotors can provide equivalent or improved performance at lower cost, but research the manufacturer’s reputation and specifications.

Rotor Types and Features

Standard solid rotors work well for most passenger vehicles and offer the lowest cost. Vented rotors feature internal cooling channels that help dissipate heat, making them suitable for heavier vehicles or performance applications. Some performance rotors include cross drilled holes or slots for additional cooling and wet weather performance.

Matching Your Driving Style

Consider your typical driving conditions when selecting rotors:

  • City driving with frequent stops: Choose rotors with good heat dissipation
  • Highway commuting: Standard rotors usually provide adequate performance
  • Mountain or hilly terrain: Vented rotors help manage heat from extended braking
  • Performance or racing: Specialized high performance rotors may be justified
  • Towing or hauling: Heavy duty rotors designed for increased thermal capacity

Maintenance Tips to Extend Rotor Life

Proper maintenance and driving habits can significantly extend rotor lifespan and delay replacement needs.

Regular Brake Inspections

Have your brakes inspected every 12,000 to 15,000 miles or during routine tire rotations. Early detection of brake pad wear prevents damage to rotors and keeps replacement costs lower.

Proper Driving Techniques

Gentle, gradual braking generates less heat and reduces rotor wear compared to hard, sudden stops. When possible, use engine braking on downhill grades to reduce brake system load. Avoid riding the brakes or keeping your foot on the brake pedal when not actively stopping.

Quality Brake Pad Selection

Using quality brake pads appropriate for your vehicle helps protect rotors. Cheap, hard brake pads can accelerate rotor wear, while pads that are too soft may not provide adequate stopping power. Semi metallic or ceramic brake pads typically offer good rotor compatibility.

Brake Fluid Maintenance

Old or contaminated brake fluid can contribute to brake system problems that affect rotor life. Replace brake fluid according to your vehicle manufacturer’s schedule, typically every 2 to 3 years.

When to Seek Professional Help

While some car owners successfully replace their own rotors, certain situations require professional expertise.

Complex Brake Systems

Modern vehicles often feature electronic brake systems, stability control, or anti lock brake systems that require special procedures or tools for rotor replacement. These systems may need professional recalibration after service.

Warranty Considerations

If your vehicle is under warranty, DIY brake work might void coverage for brake related problems. Check your warranty terms and consider having authorized dealers perform the work to maintain coverage.

Safety Concerns

If you discover additional problems during rotor inspection, such as brake line leaks, caliper issues, or master cylinder problems, professional diagnosis and repair become essential for safety.

Brake rotor replacement is an important maintenance task that directly affects your safety and your vehicle’s performance. Understanding the signs of rotor wear, replacement costs, and available options helps you make informed decisions about this critical service. Whether you choose professional installation or DIY replacement, prioritizing quality parts and proper procedures ensures reliable, safe braking performance for years to come.

Warped Brake Rotors Replacement: Driveway Fix Guide

Feeling a sudden, rhythmic vibration in your steering wheel or brake pedal when slowing down is one of the most frustrating issues a driver can face. In most cases, this shaking points to a single culprit: warped brake rotors.

When your rotors lose their smooth, perfectly flat surface, your brake pads can no longer make even, consistent contact. This leads to reduced stopping power, uneven hardware wear, and potentially dangerous driving conditions. Understanding the warning signs, replacement costs, and repair options will help you restore your vehicle’s safety quickly and conveniently.

What Actually Causes “Warped” Rotors?

While drivers commonly use the term “warped rotor,” modern solid steel rotors rarely twist out of shape like a melted record. Instead, rotor vibration usually stems from two distinct technical issues:

  1. Disc Thickness Variation (DTV): Intense thermal heat and severe wear cause the rotor face to develop micro-thin high and low spots across its circumference.

  2. Uneven Material Transfer: Holding your brake pedal down hard after an aggressive, high-speed stop can cause molten pad material to bake unevenly onto the hot rotor surface, creating a bumpy friction layer.

Regardless of the exact cause, once your rotors develop an uneven face, a warped brake rotors replacement is required to restore smooth, wobble-free braking.

Clear Signs Your Rotors Need Attention

Catching rotor issues early protects your calipers and suspension components from sustaining stress damage:

  • Steering Wheel Vibration: If your steering wheel shakes only when you press the brake pedal—and stops the moment you lift your foot—your front rotors are uneven.

  • Pulsating Brake Pedal: Feeling a rapid grabbing-and-releasing sensation through the pedal as you slow down indicates severe disc thickness variation.

  • Visible Hot Spots and Scoring: Looking through your wheel spokes reveals rotor health. Dark, discolored heat spots, blueish streaks, or deep circular gouges mean the rotor is heat-damaged beyond repair.

  • Longer Emergency Stopping Distances: Because thin or uneven rotors cannot dissipate heat or friction effectively, your car will require significantly more distance to come to a complete stop.

Replacement vs. Resurfacing (Machining)

When dealing with uneven rotors, you have two primary repair paths:

  • Rotor Resurfacing: Turning rotors on a lathe shaves down the steel face to restore a smooth finish. However, this only works if the rotor has plenty of remaining thickness above its stamped factory minimum specification and shows no deep heat cracks.

  • Full Rotor Replacement: Replacing the rotors entirely is almost always the smarter, more reliable long-term investment. Modern vehicle rotors are manufactured lighter and thinner than older cars, meaning resurfacing often leaves them too thin to handle future heat—leading to rapid re-warping.

Cost Factors for Rotor Replacement

The total cost to resolve warped rotors depends on vehicle size, rotor design, and your service method:

Repair Option Estimated Cost (Per Axle) What to Expect
DIY (Parts Only) $100 – $250 Requires heavy jacks, torque wrenches, and your weekend time.
Traditional Auto Shop $400 – $700 Includes parts, labor, and garage real estate markup.
Dealership Service Center $800 – $1,200+ Premium franchise rates and expensive OEM markups.
Mobile Brake Service Competitive & Upfront Professional installation delivered straight to your driveway.

Note: Always replace rotors in axle pairs (both fronts or both rears) alongside fresh brake pads to maintain balanced stopping pressure across the vehicle.

How to Prevent Future Rotor Warping

Once your fresh rotors are installed, simple driving and maintenance habits will maximize their lifespan:

  • Execute Proper Bedding-In: New pads and rotors require a controlled break-in procedure. Performing a series of moderate, gradual stops allows an even friction transfer layer to coat the rotor face smoothly.

  • Avoid Abrupt, Aggressive Braking: Slamming on the brakes generates extreme thermal heat. Allowing gradual deceleration lets heat dissipate evenly across the rotor face.

  • Enforce Correct Lug-Nut Torque: Over-tightened or unevenly torqued wheel lug nuts put uneven pressure on the wheel hub, forcing the soft rotor hat to distort over time. Always insist on a precision torque wrench during tire service.

The Driveway Advantage: Professional Mobile Service

Driving a vehicle with vibrating, compromised brakes to a repair garage creates unnecessary anxiety and safety risks. Mobile brake repair eliminates the stress.

Our ASE-certified technicians bring a fully equipped, rolling service bay straight to your home driveway or office parking space. We inspect your braking system, replace your warped rotors and pads using exact factory torque specifications, execute a digital multi-point check, and perform a real-world test drive while you relax inside.

Eliminate Brake Shake Today

Don’t live with a pulsating pedal or shaking steering wheel. Proactive rotor replacement eliminates dangerous driving conditions and restores factory-grade stopping power right where your car is parked.

Skip the garage waiting room and eliminate the risky drive. Check our active [mobile service coverage areas] to receive a transparent, upfront estimate for a driveway rotor inspection today.

Squeaking Brakes Repair: Driveway Noise Fix Guide

Few automotive issues are as irritating as an unmistakable high-pitched squeak or squeal every time you come to a stop light. Beyond being embarrassing, persistent noise is your vehicle’s primary acoustic warning system alerting you that something in your braking assembly requires attention.

Understanding the root cause of brake noise is the first step toward effective squeaking brakes repair. Whether your noise stems from thin friction pads, unlubricated caliper hardware, or thermal pad glazing, identifying the exact symptom ensures you restore smooth, whisper-quiet stopping power without overpaying.

Common Causes of Squeaking Brakes

Brake squeaking typically occurs when metal components vibrate against each other at high frequencies or when friction materials lose grip due to thermal glazing or contamination:

1. Worn Brake Pads & Wear Indicators

The most urgent cause of squeaking comes from critically thin brake pads. Modern brake pads include small metal tabs called mechanical wear indicators. When friction material wears down to approximately $3\text{ mm}$ to $4\text{ mm}$, this tab rubs against the rotor face to create an intentional high-pitched squeal. If ignored, thin pads will wear down to bare backing metal, causing severe rotor gouging.

2. Thermal Pad Glazing

Exposing brake pads to extreme thermal heat—such as riding your brakes down steep hills or executing repeated hard stops—causes the friction resin to melt and harden into a smooth, glassy finish. This “glazed” surface reduces friction, increases stopping distance, and produces a loud metallic squeal during light pedal application.

3. Unlubricated Caliper Hardware & Slide Pins

Brake assemblies rely on high-temperature synthetic lubricant at specific contact points. When caliper slide pins or pad backing plates dry out, metal hardware binds and vibrates against the caliper bracket. These high-frequency micro-vibrations translate directly into audible squeaks.

4. Environmental Dust & Morning Surface Rust

Dust, road grit, and ambient moisture accumulate on rotor faces overnight, creating a light layer of surface rust. This frequently causes a mild chirping sound during the first few stops of a humid morning. Morning moisture noise usually disappears after a few braking applications wear off the surface film.

How Professionals Fix Squeaking Brakes

A complete noise-reduction service goes beyond simply spraying aerosol cleaner on the wheels:

[1. Digital Inspection] -> Measure pad thickness & inspect rotor faces
[2. Deep Cleaning]      -> Remove accumulated brake dust & rust film
[3. Precision Lube]     -> Service caliper slide pins & metal contact points
[4. Hardware & Pads]    -> Replace worn hardware, anti-rattle clips, or glazed pads

Thorough System Decontamination

Technicians use specialized brake cleaner to wash away baked-on brake dust, metallic grit, and road grime from the rotor face, caliper bracket, and pad channels.

Precision Hardware Lubrication

Technicians remove caliper slide pins, clean off degraded grease, and apply fresh, high-temperature silicone or ceramic brake lubricant. Applying anti-squeal compound to pad backing plates dampens high-frequency vibrations before they convert into sound.

Surface De-Glazing or Pad Replacement

If pads show mild glazing, technicians can lightly sand the friction surface with medium-grit abrasive paper to break the glassy film. However, if pads measure under $3\text{ mm}$ or show severe thermal crystallization, complete pad replacement is required.

Squeaking vs. Grinding: Know the Urgency

Symptom Primary Cause Urgency Level Recommended Action
Light Chirping (Morning) Moisture / surface rust Low Disappears after 2–3 stops.
High-Pitched Squeal Wear indicator tab active Medium Schedule service within $500$ miles.
Harsh Metal Grinding Pads worn to backing plate CRITICAL Stop driving; immediate service required.

The Driveway Solution: Professional On-Site Service

Resolving annoying brake noise shouldn’t require spending your weekend under a jacked-up vehicle or taking time off work to sit in a repair garage waiting room.

Mobile brake repair brings certified expertise directly to you. Our ASE-certified technicians arrive in a rolling service bay right at your home driveway or workplace parking lot. We perform a multi-point noise diagnostic, measure pad thickness down to the millimeter, lubricate hardware, replace worn components, and complete a test drive to ensure your vehicle leaves with factory-quiet stopping power.

Restore Quiet, Reliable Braking Today

Don’t let annoying squeaking turn into an expensive metal-on-metal grinding emergency. Address brake noise promptly to keep your daily drive peaceful and safe.

Skip the garage waiting room and let the auto shop come to you. Check our active [mobile service coverage areas] to receive an transparent, upfront estimate for a driveway brake inspection today.

Worn Brake Pads Symptoms: Driveway Repair Guide

Your vehicle’s brake pads are among its most critical safety components, yet they naturally wear down every single time you tap the pedal. Recognizing worn brake pads symptoms early makes the difference between a routine maintenance task and a dangerous, expensive emergency breakdown.

Most drivers don’t realize their friction material is dangerously thin until they hear alarming metallic sounds. Knowing the key warning signs helps you maintain safe stopping power while protecting your rotors, calipers, and wallet from collateral damage.

Top Warning Symptoms of Worn Brake Pads

1. High-Pitched Squealing or Squeaking

The earliest audible warning sign is a sharp squeal when applying light pedal pressure. This noise comes from a built-in metal wear indicator tab. When pad thickness drops down to approximately $3\text{ to }4\text{ mm}$, this tab scrapes against the steel rotor face to alert you that your pads have reached roughly $80\%$ wear.

2. Harsh Metal-on-Metal Grinding

If you ignore the initial squeal, the remaining friction material will wear completely away. When you press the pedal, the raw steel backing plate of the pad grinds directly into your rotor face. This harsh grinding noise compromises your emergency stopping distance and rapidly gouges deep trenches into your rotors.

3. Spongy Pedal and Increased Stopping Distance

As friction pads wear down to thin slivers, the hydraulic system must push the caliper pistons much further to clamp the rotor. This creates a spongy, soft pedal feel that travels significantly closer to the floorboard, requiring extra effort and distance to bring your vehicle to a complete stop.

4. Brake Pedal Vibration or Steering Wheel Shake

When pads wear down unevenly or overheat the rotor surface, friction material transfers unevenly across the metal face. When you slow down from highway speeds, this uneven contact causes a distinct pulsing sensation through the brake pedal or a noticeable vibration in your steering wheel.

5. Vehicle Pulling to One Side

If your vehicle drifts noticeably to the left or right when braking, your pads are likely wearing at different rates between the driver and passenger sides. This uneven wear often stems from a sticking caliper slide pin, contaminated brake fluid, or hydraulic pressure imbalances that require prompt inspection.

6. Electronic Dashboard Warning Lights

Many modern commuter cars and luxury vehicles feature electronic wear sensors attached directly to the brake pads. When friction material drops past minimum safety margins, the sensor completes a circuit and triggers a dedicated brake warning light on your dashboard display.

How to Visually Inspect Your Brake Pads

You don’t always need specialized garage tools to check your pad health. On vehicles with open alloy wheels, you can perform a quick visual inspection through the wheel spokes:

  1. Look inside the wheel assembly to locate the caliper clamped over the round steel rotor.

  2. Identify the dark friction pad material pressed against the rotor face.

  3. Healthy pads show at least $6\text{ to }7\text{ mm}$ (approx. $1/4$ inch) of pad material.

  4. If the pad appears thinner than the steel backing plate behind it (under $3\text{ mm}$), immediate replacement is necessary.

Average Replacement Costs: Pads vs. Neglected Rotors

Addressing thin pads promptly keeps maintenance costs predictable:

Service Scope Average Cost Range (Per Axle) What’s Included
Brake Pad Replacement Only $100 – $300 Fresh ceramic/semi-metallic pads, clips & slide pin lube.
Pads & Rotors Package $250 – $500 New friction pads plus fresh replacement steel rotors.
Full Overhaul (Pads, Rotors, Calipers) $300 – $800+ Complete system rebuild following catastrophic metal-on-metal damage.

The Driveway Solution: Professional On-Site Service

If your brakes are squealing, grinding, or feeling soft, driving a compromised car across town to sit in a auto shop waiting room is a dangerous hassle.

Mobile brake repair eliminates the middleman. Our ASE-certified technicians arrive in a fully equipped rolling service bay right at your home driveway or office parking space. We inspect your braking system, measure pad thickness down to the exact millimeter, text you an upfront digital estimate with clear photos, and complete the installation while you relax inside.

Restore Your Stopping Power Today

Don’t wait for minor pad wear to turn into an expensive metal-on-metal grinding emergency. Address worn brake pads symptoms promptly to keep your vehicle safe and reliable.

Skip the risky drive and avoid the garage waiting room. Check our website to receive an transparent, upfront estimate for a driveway brake inspection today.

Brake Vibration When Stopping: Common Causes and Solutions

When you feel your car vibrating or shaking during braking, it can be both alarming and frustrating. Brake vibration when stopping is one of the most common automotive issues drivers experience, and understanding its causes can help you address the problem before it becomes a serious safety concern.

The vibration you feel could manifest through your steering wheel, brake pedal, or even your seat, and each type of sensation often points to different underlying issues. Most brake vibration problems stem from components that have worn out, warped, or become damaged through normal use or improper maintenance.

Understanding Brake Vibration When Stopping

Brake vibration occurs when the smooth, consistent contact between your brake pads and rotors is disrupted. Under normal circumstances, when you press the brake pedal, the brake pads should make even contact with the rotor surface, creating friction that slows your vehicle smoothly.

When components become warped, worn unevenly, or damaged, this contact becomes inconsistent. The result is a pulsating or vibrating sensation that you can feel through various parts of your vehicle. The location and intensity of the vibration often provide important clues about which components need attention.

The severity of brake vibration can range from barely noticeable to quite pronounced. While minor vibration might seem like just an annoyance, it typically indicates that your braking system needs attention and the problem will likely worsen over time if left unaddressed.

Main Causes of Brake Vibration

Warped Brake Rotors

Warped or distorted brake rotors are the most common cause of brake vibration when stopping. Brake rotors can warp due to excessive heat buildup from aggressive braking, driving through deep water after heavy braking, or simply from age and wear.

When rotors warp, they no longer provide a smooth, flat surface for the brake pads to contact. Instead, the pads encounter high and low spots on the rotor surface, creating the characteristic pulsating sensation. This type of vibration is typically felt most strongly through the steering wheel when the front rotors are affected, or through the brake pedal and seat when rear rotors are the issue.

Modern vehicles use thinner rotors than older cars to reduce weight, making them more susceptible to warping. Additionally, rotors that have been resurfaced multiple times may be too thin to handle normal heat cycles without distorting.

Uneven Brake Pad Wear

Brake pads that wear unevenly create an irregular contact surface that can cause vibration during braking. This uneven wear can result from several factors, including stuck caliper slide pins, contaminated brake fluid, or pads that were not properly bedded in after installation.

When brake pads wear at different rates across their surface, they no longer make consistent contact with the rotor. The varying thickness creates a rocking motion as the caliper piston extends and retracts, leading to brake pedal pulsation and steering vibration.

Contaminated brake pads can also cause vibration issues. Oil, brake fluid, or other substances on the pad surface create inconsistent friction, resulting in grabby or pulsating braking performance.

Sticking Brake Calipers

Brake calipers that stick or bind prevent proper pad movement and can cause significant vibration during braking. When a caliper sticks, it may not release completely after braking, keeping constant pressure on one area of the rotor and causing uneven wear and heat buildup.

Sticking calipers often result from corroded slide pins, damaged piston seals, or contaminated brake fluid. The affected wheel may also run noticeably hotter than the others, and you might notice pulling to one side during braking in addition to vibration.

Worn Suspension Components

While not directly part of the braking system, worn suspension components can amplify brake vibration or create vibration that appears to be brake related. Worn shock absorbers, struts, or bushings allow excessive movement in the wheel assembly during braking, which can manifest as vibration.

Ball joints, tie rod ends, and wheel bearings that have developed play or wear can also contribute to brake vibration. These components are designed to maintain precise wheel alignment and control, and when they wear out, they allow unwanted movement that becomes apparent during the stress of braking.

Wheel and Tire Issues

Sometimes what feels like brake vibration actually originates from wheel or tire problems that become more noticeable during braking. Wheels that are out of round, have excessive runout, or are improperly balanced can create vibration that intensifies when you apply the brakes.

Improper lug nut torque can also cause wheel mounting issues that lead to vibration. Lug nuts that are overtightened, undertightened, or unevenly torqued can warp the rotor mounting surface or create an unstable wheel mounting situation.

Diagnosing the Source of Your Brake Vibration

Identifying Vibration Location

The first step in diagnosing brake vibration is determining where you feel it most strongly. Vibration felt primarily through the steering wheel typically indicates front brake issues, while vibration felt through the brake pedal or seat often points to rear brake problems.

Pay attention to when the vibration occurs. True brake vibration should only happen when you are actively applying the brakes. If you feel vibration while driving without braking, the issue is likely related to wheels, tires, or suspension components rather than the braking system itself.

Visual Inspection Methods

A visual inspection can reveal several potential causes of brake vibration. Look through the wheel spokes to examine the visible portion of the brake rotor. Healthy rotors should have a smooth, consistent surface without obvious scoring, warping, or discoloration.

Check for uneven pad wear by looking at the thickness of the visible brake pad material. The pads should wear evenly across their surface, and both pads on each side of the rotor should show similar wear patterns.

Examine the wheels themselves for damage, proper mounting, and signs of overheating. Look for warped or cracked wheels, loose lug nuts, or evidence of brake fluid leakage around the caliper area.

Professional Diagnostic Tools

Professional brake diagnosis involves precise measurements that require specialized tools. Technicians use micrometers to measure rotor thickness at multiple points around its circumference, checking for variation that exceeds manufacturer specifications.

Dial indicators measure lateral runout, which indicates how much the rotor wobbles as it rotates. Even small amounts of runout can cause noticeable vibration during braking. Professional shops also use brake pedal effort gauges and hydraulic pressure tests to evaluate overall system performance.

Solutions for Different Types of Brake Vibration

Rotor Replacement vs Resurfacing

When warped rotors cause brake vibration, you have two primary repair options: resurfacing or replacement. Rotor resurfacing involves machining the rotor surface to restore smoothness and eliminate warping. This option works well for rotors that still have sufficient thickness after machining.

However, modern rotors are often manufactured with minimal thickness, meaning they cannot be safely resurfaced. Additionally, resurfaced rotors may be more prone to warping again due to reduced mass and heat capacity. In many cases, rotor replacement provides a more durable long term solution.

When replacing rotors, always replace them in pairs on the same axle to maintain balanced braking performance. New rotors should be properly cleaned to remove protective coatings and properly bedded in with new brake pads.

Comprehensive Brake Pad Service

Addressing brake vibration often requires complete brake pad replacement along with rotor service. New brake pads should always be installed with proper hardware, including new clips, shims, and anti squeal compounds as specified by the manufacturer.

The brake caliper slide pins should be cleaned, lubricated, and inspected for proper movement. Stuck or corroded slide pins prevent proper pad movement and can quickly cause new vibration issues even with fresh components.

Proper brake pad bedding procedures are crucial for preventing future vibration problems. This involves a specific sequence of moderate stops that allows the pad material to properly mate with the rotor surface.

Caliper Maintenance and Repair

Sticking brake calipers require thorough cleaning and often component replacement. Caliper slide pins should move freely in their bores and be properly lubricated with high temperature brake grease. Corroded or damaged slide pins must be replaced.

Caliper pistons that stick may require caliper rebuilding or replacement. This involves replacing piston seals, boots, and sometimes the piston itself. In severe cases, the entire caliper assembly may need replacement.

During caliper service, the brake fluid should be flushed to remove moisture and contaminants that contribute to internal corrosion and sticking components.

Preventing Future Brake Vibration Issues

Proper Driving Habits

Your driving habits significantly impact brake system longevity and the likelihood of developing vibration issues. Avoid aggressive braking whenever possible, as excessive heat buildup is a primary cause of rotor warping and brake component damage.

When descending long hills, use engine braking or lower gears to reduce reliance on your brakes. If you must brake heavily, allow cooling time before parking or driving through water, as rapid cooling can warp hot rotors.

Maintain proper following distances to reduce the need for sudden, hard stops. Gradual, moderate braking generates less heat and causes less wear than repeated hard stops.

Regular Maintenance Schedule

Regular brake inspections can identify potential vibration causes before they become noticeable problems. Have your brakes inspected at least annually or according to your vehicle manufacturer’s recommendations.

Monitor brake pad wear and replace pads before they become excessively thin. Worn brake pads can damage rotors and create expensive repair situations. Most vehicles have brake pad wear indicators that produce noise when replacement is needed.

Keep brake fluid fresh by following the manufacturer’s replacement schedule, typically every two to three years. Old brake fluid absorbs moisture, which leads to internal corrosion and component sticking.

Quality Component Selection

When brake components need replacement, invest in quality parts that meet or exceed original equipment specifications. Cheap brake pads and rotors may save money initially but often lead to premature wear, noise, and vibration problems.

Consider your driving conditions when selecting replacement components. Vehicles used for towing, mountain driving, or performance applications may benefit from upgraded brake components designed for higher heat tolerance.

Ensure proper installation by qualified technicians who follow manufacturer procedures for cleaning, lubrication, and bedding in new components.

When to Seek Professional Help

While some brake maintenance can be performed by experienced DIY mechanics, brake vibration diagnosis and repair often require professional expertise and tools. If you experience persistent vibration after basic maintenance, have the system professionally diagnosed.

Seek immediate professional attention if brake vibration is accompanied by other symptoms such as pulling to one side, grinding noises, reduced stopping power, or a soft brake pedal. These symptoms may indicate more serious brake system problems that affect safety.

Professional brake service becomes especially important if you are not comfortable with brake system work or lack the proper tools for safe service. Brake systems are critical safety components that require proper knowledge and equipment for reliable repair.

Remember that brake vibration typically worsens over time and can lead to more expensive repairs if ignored. Addressing vibration issues promptly often results in less costly repairs and maintains optimal braking performance for your safety and that of other drivers.

7 Warning Signs Brake Pads Need Replacing: Driveway Guide

Brake pads are one of the most vital safety components on your vehicle, yet many drivers wait until it is almost too late before replacing them. Recognizing the early warning signs brake pads need replacing can save you hundreds of dollars in unnecessary rotor damage while keeping your passengers completely safe on the road.

Most quality brake pads are engineered to last between $25,000$ to $70,000$ miles depending on your driving conditions, vehicle weight, and pad materials. However, mileage alone should never be your only indicator. Your vehicle will communicate when it needs attention through several unmistakable symptoms—and catching them early is the key to painless maintenance.

1. High-Pitched Squealing and Screeching

The most common early warning indicator is a persistent squealing or screeching noise when you press the brake pedal. This sound comes from a small, built-in metal wear indicator tab. When your friction material wears down to approximately $4\text{ mm}$ in thickness, this tab makes light contact with the rotor face, creating an intentionally annoying, high-pitched squeal.

This noise is your vehicle’s way of saying your pads have reached about $80\%$ wear. Do not ignore it—replacing your pads at this stage protects your rotors from sustaining deep heat gouges.

2. Deep Grinding and Metal-on-Metal Scraping

If that squealing progresses to a deep grinding, rumbling, or harsh scraping sound, your brake pads are completely gone. At this point, the steel backing plate of the pad is grinding directly against your steel rotor.

This metal-on-metal contact creates severe gouges in your rotors with every single stop, often accompanied by a rough, gritty feeling in the brake pedal. If you hear grinding, stop driving immediately. Continuing to operate the vehicle risks total hydraulic brake failure and guarantees an expensive rotor replacement.

3. Pedal Pulsation and Steering Wheel Vibration

Do you feel a violent vibration or rhythmic pulsing in the brake pedal or steering wheel when slowing down from highway speeds? This happens when severely worn pads transfer friction material unevenly across the rotor surface, creating high and low spots.

While pulsation often points to warped rotors, it almost always starts with neglected, severely worn brake pads that overheated the rotor face.

4. Spongy Pedal and Longer Stopping Distances

As brake pads wear thin, the hydraulic system must push the caliper pistons much further to clamp down on the rotor. This leads to a spongy brake pedal that travels much closer to the floor than usual.

Because reduced friction material decreases your vehicle’s overall stopping power, your stopping distances will gradually increase. This symptom is particularly dangerous because it develops slowly, causing drivers to adapt without realizing their emergency stopping distance has been severely compromised.

5. Dashboard Warning Light Activation

Many modern commuter cars and luxury vehicles feature electronic brake pad wear sensors. When pad thickness drops below safe operating margins (usually around $3/32$ of an inch), the sensor wire wears through, triggering a dedicated brake warning light on your dashboard.

Checking your owner’s manual will help you identify whether your dashboard light signifies low hydraulic fluid or thin brake pads.

6. Visible Thin Friction Material

If your car features open alloy wheels, you can visually inspect your brake pad thickness through the wheel spokes without taking the tire off:

  1. Locate the brake caliper clamped over the shiny round rotor.

  2. Look inside the caliper housing to spot the friction pad pressed against the rotor face.

  3. Healthy pads should show at least $7\text{ mm}$ (about $1/4$ inch) of pad material.

  4. If the pad looks thinner than the metal backing plate behind it (under $4\text{ mm}$), immediate replacement is necessary.

7. Vehicle Pulling to One Side

If your car pulls noticeably to the left or right when you press the brake pedal, your pads are likely wearing unevenly between the driver and passenger sides. One side may be completely worn down due to a sticking caliper pin or uneven hydraulic pressure, creating unbalanced stopping force that can make sudden emergency stops highly unpredictable.

The True Cost of Waiting Too Long

Ignoring these critical warning signs transforms a routine, low-cost maintenance task into a major financial headache:

  • Pad Replacement Only: Replacing thin pads early is fast, straightforward, and affordable.

  • Neglected Pad Damage: Driving on bare metal backing plates destroys the smooth surface of your rotors, forcing you to replace both the pads and rotors together—easily doubling or tripling your total bill.

  • Severe System Failure: Extreme wear can cause caliper pistons to overextend, leak hydraulic brake fluid, or seize completely, resulting in massive repair bills and extreme safety risks.

The Smart Solution: Driveway Mobile Service

When you notice these warning signs, driving a compromised car to a local repair garage or arranging a tow truck is a hassle you don’t need.

Mobile brake repair eliminates the stress. Our ASE-certified technicians bring a fully equipped rolling service bay straight to your driveway or office parking space. We perform an on-site inspection, measure your hardware down to the exact millimeter, text you a clear digital report with photos, and perform a full pad and rotor replacement while you relax inside.

Protect Your Stopping Power Today

Don’t wait for a minor squeak to turn into an expensive metal-on-metal grinding emergency. If your vehicle is exhibiting any of these seven warning signs, address it immediately.

Skip the garage waiting room and eliminate the dangerous drive. Check our site at www. to receive a transparent, upfront estimate for a driveway brake inspection today.

  • Q: Can I drive my car if my brakes are squealing?

    • A: Yes, but only for a short period. Squealing is your pad’s built-in wear indicator warning you that $80\%$ of the friction material is gone. You should schedule a brake inspection immediately before the remaining material wears down to the metal backing plate.

  • Q: How many millimeters should new brake pads have?

    • A: Brand new brake pads typically feature between 10mm to 12 text mm of fresh friction material. Replacement is strongly recommended once the material wears down to 3 mm or 4mm

  • Q: Why are my inner brake pads wearing faster than the outer ones?

    • A: Inner brake pads often wear faster if your caliper slide pins are dry, unlubricated, or sticking. A professional mobile brake service always cleans and lubricates these slide pins during pad installation to guarantee even wear.

How Often Should Brake Pads Be Replaced? The Complete Guide to Safer Driving

Most automotive guidebooks suggest drivers replace their brake pads every 30,000 to 70,000 miles. However, this wide range only tells part of the story. Understanding how often to replace brake pads on your specific vehicle depends on a variety of real-world variables far beyond standard odometer mileage.

Knowing the right timing for your driving habits keeps your family safe on the road while preventing minor pad wear from morphing into expensive rotor or caliper damage.

Mileage Guidelines by Driving Environment

Where and how you drive plays the single largest role in dictating your brake pad replacement interval:

  • City & Urban Commuting (30,000 – 35,000 Miles): Heavy stop-and-go traffic, frequent stoplights, and pedestrian slowdowns generate constant thermal friction. Urban driving wears friction material down rapidly, requiring more frequent pad changes.

  • Highway Driving (70,00080,000+ Miles): Cruising at consistent highway speeds with minimal pedal application allows your braking system to cool continuously. Highway commuters can often double the lifespan of their pads.

  • Mixed Driving (40,000 – $60,000 Miles): The standard benchmark for the average suburban driver balancing daily school runs with occasional highway trips.

Front vs. Rear Pad Lifespans

Your front brake pads handle approximately 60% to 70% of your vehicle’s total stopping weight due to forward momentum during deceleration. Consequently, front pads typically require replacement around 30,000 to 50,000 miles, while rear pads often last 20% to 30% longer.

Key Factors That Alter Your Pad Lifespan

Aside from location, these four core variables determine how fast your friction material degrades:

  1. Driving Style: Aggressive acceleration followed by abrupt, late stops rapidly burns through pad material. Smooth, gradual braking extends component life significantly.

  2. Vehicle Weight and Towing: Heavy SUVs, commercial vans, and trucks hauling heavy payloads require substantially more hydraulic clamping force to stop, accelerating wear.

  3. Terrain and Elevation: Navigating steep hills or mountain grades requires continuous downhill braking, subjecting pads to extreme heat that speeds up breakdown.

  4. Pad Material Composition: Soft organic pads (25,00040,000 miles) operate quietly but wear quickly. Semi-metallic pads (40,00070,000 miles) handle extreme heat well. Premium ceramic pads (70,000+ miles) provide maximum longevity with minimal black wheel dust.

The 3-Millimeter Safety Rule

Automotive safety standards dictate that brake pads must be replaced once the friction material drops down to 3mm (approx. 1/8 inch) or less.

Below 3mm, the pad loses its ability to dissipate intense thermal heat effectively. Continuing to drive past this limit risks complete friction material detachment, warped rotors, and a catastrophic loss of stopping power.

Unmistakable Symptoms It’s Time for New Pads

You don’t need a mechanics tape measure to know your pads are thin. Your vehicle will alert you through several physical warning signs:

  • High-Pitched Squealing: A built-in metal indicator tab scrapes against the rotor to create a sharp squeal once pads wear down to 3mm, giving you a small window to schedule service.

  • Metal-on-Metal Grinding: A harsh grinding or rumbling sound means the pad material is completely gone and the steel backing plate is gouging into your rotor.

  • Spongy Pedal or Reduced Response: If your brake pedal travels further toward the floor or requires heavy pressure to slow down, your system requires immediate attention.

  • Dashboard Warning Light: Modern vehicles feature electronic wear sensors that trigger a specific dashboard light when pad thickness drops below safe operating limits.

The Convenient Solution: On-Site Mobile Service

Tracking pad thickness or scheduling garage visits around work shifts can be frustrating. Mobile brake repair eliminates the inconvenience of the traditional shop model.

Our ASE-certified technicians bring a fully equipped, rolling repair bay directly to your home driveway or workplace parking space. We perform a multi-point inspection, measure your hardware down to the exact millimeter, text you a clear digital report with photos, and perform a full pad and rotor swap while you stay productive inside.

Protect Your Commute and Your Wallet

Never wait for a minor squeak to turn into a dangerous grinding emergency. Proactive brake maintenance keeps your vehicle operating safely while saving you hundreds in avoidable rotor replacements.

Skip the garage waiting room and let the auto shop come to you. Check our active [mobile service coverage areas] to get a transparent, upfront estimate for a driveway brake inspection today.

  • Q: How many miles do brake pads usually last?

    • A: On average, brake pads last between 30,000 to 70,000 miles. City drivers in heavy traffic usually need replacements around 30,000 miles, while highway drivers can often stretch their pads past 70,000 miles.

  • Q: How can I check my brake pad thickness without taking the wheel off?

    • A: You can visually inspect your pads by looking through your wheel spokes at the brake caliper clamped over the rotor. Healthy pads should show at least 7mm of material; if you see less than 3mm thinner than the metal backing plate, replacement is required immediately.

  • Q: Is it okay to replace just front brake pads?

    • A: Yes. Front brake pads wear down roughly twice as fast as rear pads because they handle up to 70% of your vehicle’s stopping weight. It is completely safe to replace only the front axle pads as long as both front wheels receive identical new hardware at the same time.

Front Brake Pad Replacement: Complete Cost and Process Guide for Vehicle Owners

Because your vehicle’s front brakes handle approximately 60% to 70% of its total stopping power, your front brake pads naturally wear down much faster than the rears. Front brake pad replacement is the vital process of swapping out this thin, worn friction material with fresh hardware to secure your stopping performance.

When your front pads drop to minimum safety margins—typically around 3 to 4 millimeters—putting off service risks warp damage to your expensive rotors or failure of your calipers. Here is a clear breakdown of the warning signs, the actual front brake pad replacement cost, and the smartest ways to get it fixed.

Signs Your Front Brake Pads Are Thin

Because the front axle bears the brunt of your vehicle’s weight transfer during deceleration, warning signs usually manifest clearly:

  • High-Pitched Squealing: Most modern pads feature built-in metal wear indicators that intentionally create a sharp squeal against the rotor when the friction material drops past safe levels.

  • Harsh Metal Grinding: If you ignore the squeal, the pads will wear down to the steel backing plates. This creates a severe metal-on-metal grinding sound that actively ruins your rotors.

  • Steering Wheel Vibrations or Soft Pedal: Worn front components heavily degrade pedal feedback, resulting in a spongy pedal feel or a violent shaking sensation in your steering wheel when slowing down from highway speeds.

  • Dashboard Warnings: Many modern luxury and commuter vehicles feature specialized electronic sensors that illuminate a specific brake pad wear light on your dashboard.

Front Brake Pad Replacement Cost Breakdown

When looking at the financial numbers, your total bill depends heavily on whether you choose a dealership garage, a traditional independent shop, a DIY setup, or a professional mobile mechanic.

Professional Shop vs. Dealership Costs

At a traditional brick-and-mortar repair shop, a professional front brake pad replacement typically ranges from $150 to $400 per axle. Labor rates generally command $100 to $150 of that total, with parts retail markup comprising the rest.

If you visit a traditional dealership service center, premium brand positioning and steep building real estate overhead can easily push those front axle costs north of $450+, especially for heavy-duty trucks or premium import vehicles.

The Real Cost of DIY Replacement

Tackling the replacement in your own garage drops the bill to the raw price of parts—usually $30 to $100 per axle depending on the pad compound. However, a successful DIY front brake job requires specialized gear: a heavy-duty floor jack, safety jack stands, a caliper piston compression tool, high-temperature ceramic brake grease, and specialized aerosol cleaners.

If you don’t already own this equipment, buying it instantly erases your DIY savings. Furthermore, because brakes are a safety-critical system, any installation mistake can compromise your hydraulic pressure and create highly dangerous driving conditions.

Selecting the Right Brake Pad Material

Your front pads take a massive thermal beating. Selecting the right composition directly alters your daily driving experience:

  • Ceramic Brake Pads: The premium choice for modern commuter cars and SUVs. Ceramic compounds offer superior heat dissipation, exceptional longevity, completely silent operation, and produce zero ugly black wheel dust.

  • Semi-Metallic Brake Pads: Infused with durable steel fibers, these pads are built for heavy-duty trucks, hauling, and high-performance track driving. They handle extreme temperatures beautifully but tend to create slightly more ambient noise and metallic dust.

  • Organic Brake Pads: Made from quiet resin composites, these pads are soft and inexpensive but wear out rapidly under heavy daily braking demands.

The Smart Alternative: Elite Mobile Brake Service

Mobile brake repair offers the ultimate middle ground for busy drivers. By engineering fully equipped, rolling service bays out of customized vans, we eliminate the immense overhead expenses tied to fixed commercial real estate buildings.

This means we can pass massive savings straight to our customers, providing ASE-certified mechanics, premium OEM-equivalent hardware, and strict warranty protections right in your home driveway or office parking lot.

Our Clean, Professional On-Site Process

  1. Digital Multi-Point Inspection: Our technician safely lifts your vehicle using specialized portable lifts, removes the front wheels, and evaluates the hardware. We text a clear digital report with real photos of your components and an upfront estimate directly to your phone.

  2. Precision Calibration: We compress your caliper pistons safely using professional tools, clean and lubricate your slide pins to prevent uneven future wear, and install fresh anti-rattle clips.

  3. Real-World Verification: Every mobile service concludes with a strict real-world test drive to perfectly bed-in your new front friction material, ensuring factory-grade stopping power the moment we hand back your keys.

Secure Your Commute Without the Waiting Room

You shouldn’t have to waste a Saturday morning or pay inflated dealership markups just to service your vehicle’s front axle. Proactive front pad maintenance prevents expensive rotor damage and ensures your car stops exactly when you need it to.

Skip the frustration of the traditional garage waiting room. Check our active [mobile service coverage areas] to receive an transparent, upfront estimate for your front brake pad replacement delivered straight to your door.

  • Q: Why do front brake pads wear out faster than rear brake pads?

    • A: When you press your brake pedal, physics causes your vehicle’s weight to shift violently forward. Because of this forward kinetic momentum, your front braking network is engineered to handle up to 70% of your car’s total stopping force, causing front pads to wear down roughly twice as fast as rears.

  • Q: Can I replace just my front brake pads and not the rears?

    • A: Absolutely. Because front and rear brakes wear down at completely different rates, it is standard practice to replace your pads strictly by axle set. As long as both front wheels receive identical new pads at the same time, your braking distribution will remain completely safe.

  • Q: How long do front brake pads typically last?

    • A: On average, front brake pads last between 30,000 to 70,000 miles. This lifespan depends heavily on your driving habits, vehicle weight, and pad material—stop-and-go city commuting or aggressive braking accelerates wear significantly faster than highway driving.